Abstract: Sechelt Home Inspector notes on winterizing exposed exterior water lines on a house using a product commonly referred to as heat tape. Tips on how it works and how best to install it for maximum benefit.
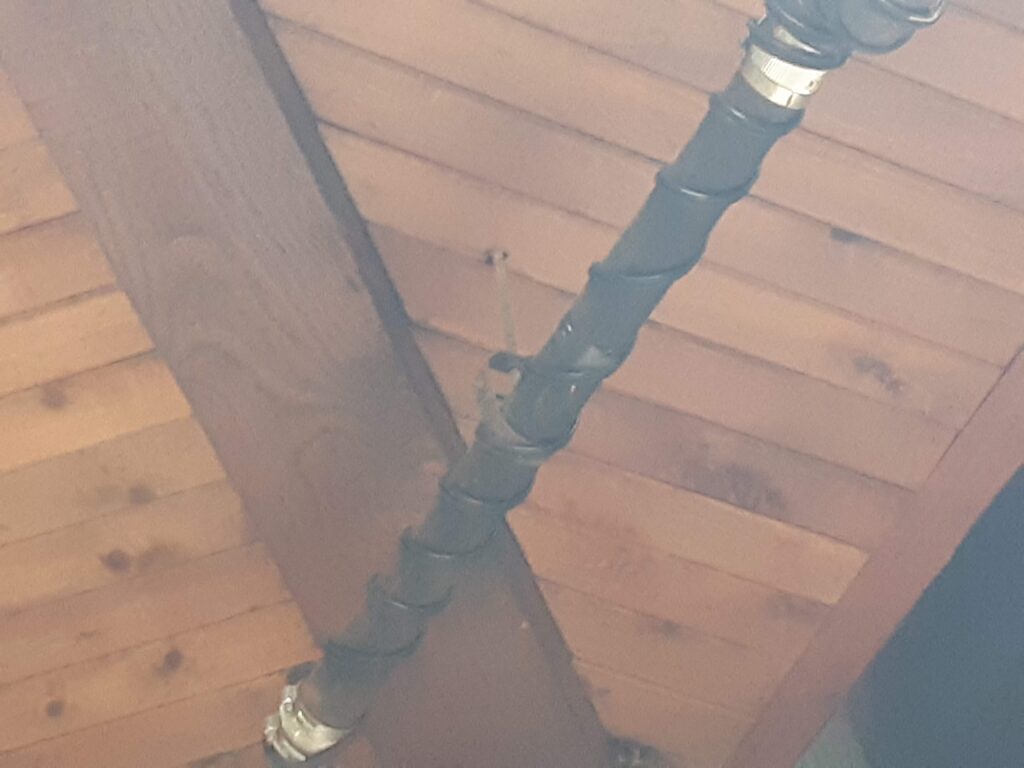
Photo: The electrical heat tape can be seen wrapped around the drain line. Since there is no insulation over the pipe, the effectiveness of the heat tape greatly reduced.
A home inspection of a cliff-side dwelling noted that there was heat tracing on the exterior plumbing lines. Yes indeed we do experience freezing temperatures on the Sunshine Coast, for weeks or even months at a time. So it’s important to have exposed water supply and drain lines freeze protected.
How Heat Tape Works
Essentially this is a long flexible resistor that heats uniformly along its entire length. Heat tracing is run along a small diameter pipe, say less than 2 inches, or spiralled around a larger pipe. Heat tapes come in various configurations: always on, self limiting or thermostatically controlled. When installing, special attention should be paid to banding the heat tape to the pipe for maximum transfer of heat by conduction. Remember, if the tape is not touching the pipe then it is not heating it.
Common Installation Mistake
The most common mistake during installation is not to add insulation over the pipe and tape. Without insulation, well over 50% of the heat is being wasted because it is just heating the ambient air. With insulation, the heat is captured and retained in the space beteen the pipe and its insulation.
Insulation Saves $
Insulation can be purchased as a blanket that wraps around the pipe or a premanufactured sleeve in various internal diameters that fits snugly over the pipe. Even a fiberglass batt can be used by wrapping it around the pipe. Always finish the heat tape installation with a thermal sock over it. Otherwise you are just heating air and your wasting money.